
One pumpkin, twice the fun: pumpkin carving stencils and a classic pumpkin seed recipe
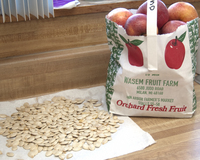
Fresh apples and seeds from a pumpkin that came from Wasem Fruit Farm.
Renee Tellez | AnnArbor.com
October is half over and it finally feels like fall. Since this is my favorite season, I decided to celebrate by taking a trip to Wasem Fruit Farm, located on Judd Road in Milan. This the busiest season for many apple orchards, so Wasem is open daily from 9 a.m. to 6 p.m. until Oct. 31; and for limited hours until Dec. 17.
My intention was to buy a pumpkin and one of their delicious pumpkin/sugar donuts; instead I walked out with a pumpkin, a bag of fresh apples, six donuts, and a caramel apple.
Buying from a locally owned farm is good for two reasons: the money stays in the community and the produce is fresh. If you can't make it to the farm, the Ann Arbor Farmers' Market carries Wasem produce, too.
Usually a pumpkin or two get purchased just to sit outside and look festive in front of my house. This year, I wanted to be different and actually carve the pumpkin. It didn't hurt that that the World Wildlife Fund released several pumpkin carving stencils that anyone can download for free. There are 10 designs to choose from, all available at www.worldwildlife.org/sites/pumpkins/
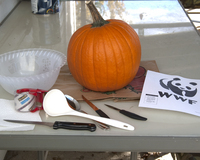
Carving a pumpkin is messy work, so stay outside if possible.
Renee Tellez | AnnArbor.com
- Paper bag or old newspaper
- Different sized knives (kids, stick to the child-safe kind)
- Spoons for scooping out the "pumpkin guts"
- Paper or cloth towels for your hands
- Bowl to save the seeds in
- Stencil if you're using one
- Tape (that stencil won't stay by itself)
- Patience (if you're like me, something will go wrong)
Once you've gathered everything together; cut the top off, scoop out the inside, and start making pumpkin art.
Besides creating a cool decoration for your house, pumpkin carving serves another purpose: a tasty treat. That's right, don't throw those seeds away. Baked Pumpkin Seeds not only taste good, but they're good for you. There are tons of recipes out there, most of them are pretty similar. The one I used was from eHow.com.
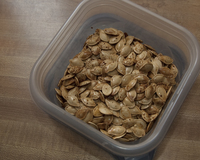
Baked and ready to eat.
Renee Tellez | AnnArbor.com
Step 1: Preheat the oven to 350°F (oven temp may vary).
Step 2: Clean the seeds — remove all the stringy membrane and rinse, rinse, rinse.
Step 3: Put the seeds on a paper towel and let them dry for a few minutes. (They won't be completey dry; I left them there while I cooked and ate dinner, and they were still not dry.)
Step 4: Spray a baking sheet with butter-flavored cooking spray (I used canola oil spray) or brush with a light coating of oil. Put the seeds on the baking sheet in a single layer and coat the seeds with the same spray or oil. Finish off by sprinkling the seeds lightly with salt and/or your favorite herb. (I used salt and garlic for mine).
Step 5: Put the baking sheet in the oven. Cook the seeds for 10 to 20 minutes, or until brown and slightly crisp, turning once. (This wasn't long enough for my taste; I cooked for 20 minutes, turned and cooked for another 15, for a total of 35 minutes.)
Step 6: Allow to cool before eating (or not, if you're like me). Store in an airtight container.

My finished "Bear-O-Lantern".
Renee Tellez | AnnArbor.com
When she’s not busy celebrating fall, Renee Tellez works on the Entertainment Desk at AnnArbor.com. You may contact her at reneetellez@annarbor.com.
Comments
Mark A.
Mon, Oct 18, 2010 : 12:36 p.m.
I never realized how easy it is to roast the pumpkin seeds. I always composted them, but not anymore. Beautiful panda pumpkin carving!
SillyTree
Mon, Oct 18, 2010 : 7:28 a.m.
I am so used to looking at traditional pumpkins that it took me a few seconds to see the bear. I kept trying to make the bear's body into a mouth and that just didn't work. Yeah! It's pretty cool.