A small, simple step toward better coffee

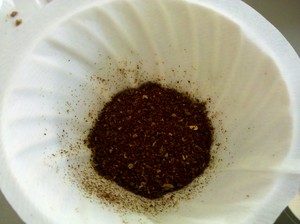
A dry bed of grounds waits in a hand-pour filter cone.
Matt Roney | Contributor
I’ve said it before, and I’ll say it again: It’s very easy to brew excellent coffee at home. The difference between a clear, well-balanced, complex cup and dirty bitter water lies simply in attention to detail and knowledge of the processes at work .
Last week, I talked about the importance of an even, clean grind. This week, I’d like to focus on a process that affects both the composition of your coffee and the quality of your extraction — blooming.
What coffee geeks refer to as the “bloom” is a result of the roasting process. Roasting, obviously, is a process by which the fresh green pits of the cherry-like fruit of the coffee plant are cooked. Just as when other organic matter is cooked, gases — CO2, especially — are released. After roasting, these gases gradually escape over time. We call this — wait for it — “degassing.”
Have you ever noticed the one-way valves built into many bags of coffee? Those valves are specifically designed to deal with degassing, releasing CO2 as it seeps from the beans. That way, the bag remains airtight, keeping coffee fresher longer.

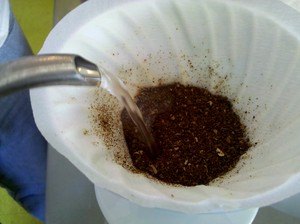
Water is carefully poured, beginning just inside of the edge.
Matt Roney | Contributor
And, naturally, coffee freshness is extremely important. The same gases that can speed up staleness if they’re left in the bag account for much of a cup’s aroma and flavor. If too much time has passed since roasting, you’ll end up with a flat, wholly unremarkable brew.
It’s the rapid release of those gases that we call "blooming." When hot water hits freshly ground coffee, the rate of degassing increases, causing the bed of grounds to noticeably puff up. The rapidly-escaping gases actually push any water flowing through away from the grounds. If water doesn’t have sufficient contact with the grounds, the extraction will be poor.
Ways of dealing with this differ depending on the brewing method; for French press, especially, the topic is still debated. When making drip coffee, however, particularly hand pour, things are much simpler. You simply wet the grounds.
Begin your pour on the outside edge of the bed of grounds, just in from the wall of the filter cone. Pour a thin stream very carefully in a slow, inward-spiraling motion, ending in the center, and then stop pouring.

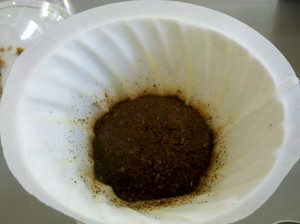
Now saturated, the bed of grounds expands, or "blooms."
Matt Roney | Contributor
Use as little water as you can while still ensuring that all the grounds are wet — the less water that drips out the bottom, the better. You’ll see your bed of grounds expanding into a dome shape. It should be allowed to sit for at least 30 seconds, until the grounds seem to deflate. At this point, it’s safe to finish your pour.
The process is a little more difficult where automatic brewers are concerned. Here is a post suggesting possible methods for blooming under those circumstances.
It's a bit more trouble, but the difference is more than worth it.
Matt Roney is a barista at lab cafe and a contributor to Radio Free Chicago. He can be reached by email here.


Comments
Bertha Venation
Wed, May 25, 2011 : 8:43 p.m.
I've had fancy coffee makers in the past. Expensive and always broke down. IMHO, the most reliable, fast, uncomplicated coffee maker is still my best bud...Mr. Coffee!
DFSmith
Wed, May 25, 2011 : 2:43 p.m.
I do watch for the blooming when I use my French Press. Especially when I use freshly roasted beans. Will have to stop by and get yu advice to choose an Intelli blend to buy for for use in a moka-pot.
Matt Roney
Wed, May 25, 2011 : 7:03 p.m.
Sure, I'd be glad to help! I've never actually used a moka pot, but I'm familiar with the concept. Do you generally use espresso blends in something like that?